Suspension and steering check (Every 6000 miles or 6 months)
Front suspension and steering
check
1 Raise the front of the vehicle, and securely
support it on axle stands (see “Jacking and
Vehicle Support”).
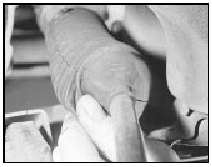
2 Visually inspect the balljoint dust covers and the steering rack-and-pinion gaiters for splits, chafing or deterioration (see illustration). Any wear of these components will cause loss of lubricant, together with dirt and water entry, resulting in rapid deterioration of the balljoints or steering gear.

18.2 Checking a steering gear gaiter
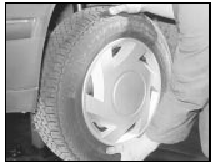
3 Grasp the roadwheel at the 12 o’clock and 6 o’clock positions, and try to rock it (see illustration). Very slight free play may be felt, but if the movement is appreciable, further investigation is necessary to determine the source. Continue rocking the wheel while an assistant depresses the footbrake. If the movement is now eliminated or significantly reduced, it is likely that the hub bearings are at fault. If the free play is still evident with the footbrake depressed, then there is wear in the suspension joints or mountings.

18.3 Rocking the roadwheel to check steering/suspension components
4 Now grasp the wheel at the 9 o’clock and 3 o’clock positions, and try to rock it as before.
Any movement felt now may again be caused by wear in the hub bearings or the steering track-rod balljoints. If the inner or outer balljoint is worn, the visual movement will be obvious.
5 Using a large screwdriver or flat bar, check for wear in the suspension mounting bushes by levering between the relevant suspension component and its attachment point. Some movement is to be expected as the mountings are made of rubber, but excessive wear should be obvious. Also check the condition of any visible rubber bushes, looking for splits, cracks or contamination of the rubber.
6 With the car standing on its wheels, have an assistant turn the steering wheel back and forth about an eighth of a turn each way.
There should be very little, if any, lost movement between the steering wheel and roadwheels. If this is not the case, closely observe the joints and mountings previously described, but in addition, check the steering column universal joints for wear, and the rackand- pinion steering gear itself.
7 Visually check that each lower arm balljoint is correctly located in the hub carrier, ensuring that the Torx type pinch-bolt is fully engaged in the groove in the balljoint stud.
Suspension strut/shock absorber
check
8 Check for any signs of fluid leakage around
the suspension strut/shock absorber body, or
from the rubber gaiter around the piston rod.
Should any fluid be noticed, the suspension strut/shock absorber is defective internally, and should be renewed. Note: Suspension struts/shock absorbers should always be renewed in pairs on the same axle.
9 The efficiency of the suspension strut/shock absorber may be checked by bouncing the vehicle at each corner.
Generally speaking, the body will return to its normal position and stop after being depressed. If it rises and returns on a rebound, the suspension strut/shock absorber is probably suspect. Examine also the suspension strut/shock absorber upper and lower mountings for any signs of wear.
See also:
Cold start valve - removal and refitting
Note: Refer to the precautions at the end of
Section 1 before proceeding.
K-Jetronic system
Removal
1 Disconnect the battery earth lead.
2 Detach the electrical wiring multi-plug from
the valve ...
Crankshaft and main bearings - removal and refitting
1.8 litre (R2A type)
Removal
1 With the engine removed from the vehicle,
remove the timing belt, crankshaft sprocket
and thrustwasher.
2 Remove the pistons and connecting rods. If
no work is to ...
Windscreen/tailgate wiper blades and arms - removal and
refitting
Removal
1 Pull the wiper arm away from the glass until
the arm locks.
2 Depress the small clip on the blade and
slide the blade out of the hooked part of the
arm (see illustration).
17.2 Disco ...
