Changing the tires
If you get a flat tire while driving, do not apply the brake heavily.
Instead, gradually decrease your speed. Hold the steering wheel firmly and slowly move to a safe place on the side of the road.
The use of tire sealants is not recommended and may compromise the integrity of your tires.
Temporary spare tire information
The temporary spare tire for your vehicle is labeled as such. It is smaller than a regular tire and is designed for emergency use only. Replace the temporary spare tire with a full-size tire as soon as possible.
If you use the temporary spare tire continuously or do not follow these precautions, the tire could fail, causing you to lose control of the vehicle, possibly injuring yourself or others.
When driving with the temporary spare tire do not:
- use more than one temporary spare tire at a time
- exceed 80 km/h (50 mph)
- load the vehicle beyond maximum vehicle load rating listed on the Safety Compliance Label
- tow a trailer
- use tire chains
- drive through an automatic car wash, because of the vehicle's reduced ground clearance
- try to repair the temporary spare tire or remove it from its wheel
- use the wheel for any other type of vehicle
Use of a temporary spare tire at any one wheel location can lead to impairment of the following:
- handling, stability and braking performance
- comfort and noise
- ground clearance and parking at curbs
- Winter driving capability
Tire change procedure
1. Park on a level surface, activate hazard flashers and set the parking brake.

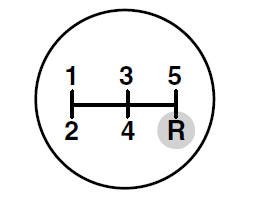
When one of the front wheels is off the ground, the transaxle alone will not prevent the vehicle from moving or slipping off the jack, even if the vehicle is in P (Park) (automatic transaxle) or R (Reverse) (manual transaxle).
To prevent the vehicle from moving when you change a tire, be sure the parking brake is set, then block (in both directions) the wheel that is diagonally opposite (other side and end of the vehicle) to the tire being changed.
If the vehicle slips off the jack, you or someone else could be seriously injured.
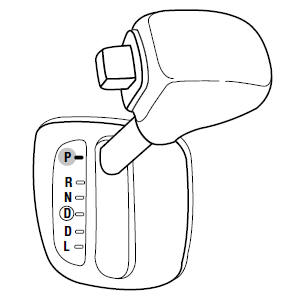
2. Place gearshift lever in P (Park) (automatic transaxle) or R (Reverse) (manual transaxle), turn engine OFF, and block the diagonally opposite wheel.
- Automatic
- Manual
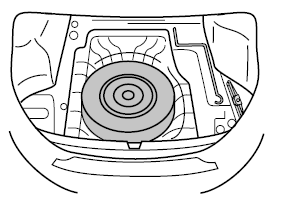
3. Remove the jack, jack handle, lug wrench and spare tire.
4. Loosen each wheel lug nut one-half turn counterclockwise but do not remove them until the wheel is raised off the ground.
5. Put the jack in the jack notch next to the door of the tire you are changing. Turn the handle clockwise until the wheel is completely off the ground.
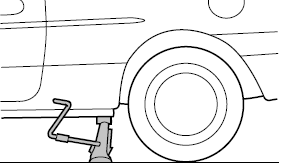
6. Remove the lug nuts with the lug wrench.
7. Replace the flat tire with the spare tire, making sure the valve stem is facing outward. Reinstall the lug nuts until the wheel is snug against the hub. Do not fully tighten the lug nuts until the wheel has been lowered.
8. Lower the wheel by turning the jack handle counterclockwise.
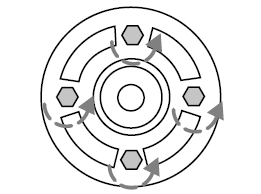
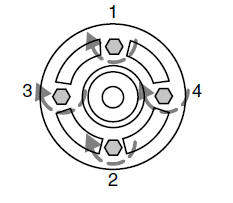
9. Remove the jack and fully tighten the lug nuts in the order shown.
10. Put flat tire, jack and lug wrench away. Make sure the jack is fastened so it does not rattle when you drive.
Unblock the wheels.
See also:
Engine coolant
Checking engine coolant
The concentration and level of engine coolant should be checked at the
mileage intervals listed in the scheduled maintenance guide. The coolant
concentration should be maint ...
Temperature gauge sender removal and refitting
Removal
1 On SOHC models, the temperature gauge
sender is located on the front left-hand side of
the cylinder head, just in front of the inlet
manifold. On CVH models, the sender is
located on th ...
Timing belt and sprockets - removal and refitting
Note: The belt tension should be checked
using Ford special tool No 21-113 after
refitting. A suitable puller may be required to
remove the sprockets. If the camshaft
sprocket is removed, a new re ...
