Transmission fluid
Checking automatic transmission fluid
Refer to your scheduled maintenance guide for scheduled intervals for fluid checks and changes. Your transaxle does not consume fluid.
However, the fluid level should be checked if the transaxle is not working properly, i.e., if the transaxle slips or shifts slowly or if you notice some sign of fluid leakage.
Automatic transmission fluid expands when warmed. To obtain an accurate fluid check, drive the vehicle until it is warmed up (approximately 30 km [20 miles]). If your vehicle has been operated for an extended period at high speeds, in city traffic during hot weather or pulling a trailer, the vehicle should be turned off for about 30 minutes to allow fluid to cool before checking.
1. Drive the vehicle 30 km (20 miles) or until it reaches normal operating temperature.
2. Park the vehicle on a level surface and engage the parking brake.
3. With the parking brake engaged and your foot on the brake pedal, start the engine and move the gearshift lever through all of the gear ranges. Allow sufficient time for each gear to engage.
4. Latch the gearshift lever in P (Park) and leave the engine running.
5. Remove the dipstick, wiping it clean with a clean, dry lint free rag. If necessary, refer to Identifying components in the engine compartment in this chapter for the location of the dipstick.
6. Install the dipstick making sure it is fully seated in the filler tube.
7. Remove the dipstick and inspect the fluid level. The fluid should be in the designated areas for normal operating temperature.
Low fluid level
Do not drive the vehicle if the fluid
level is at the bottom of the dipstick
and the outside temperatures are
above 10ВєC (50ВєF). 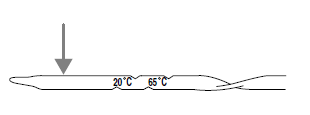
Correct fluid level
The transmission fluid should be checked at normal operating temperatures 66ВєC-77ВєC (150ВєF-170ВєF) on a level surface. The normal operating temperature can be reached after approximately 30 km (20 miles) of driving.
The transmission fluid should be in
this range if at normal operating
temperature (66ВєC-77ВєC
[150ВєF-170ВєF]). 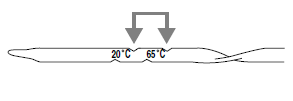
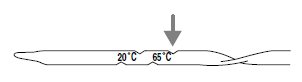
High fluid level
Fluid levels above the safe range may result in transaxle failure. An overfill condition of transmission fluid may cause shift and/or engagement concerns and/or possible damage.
High fluid levels can be caused by an overheating condition.
Adjusting automatic transmission fluid levels
Before adding any fluid, make sure the correct type is used. The type of fluid used is normally indicated on the dipstick and also in the Lubricant specifications section in this chapter.
Use of a non-approved automatic transmission fluid may cause internal transaxle component damage.
If necessary, add fluid in 250 mL (1/2 pint) increments through the filler tube until the level is correct.
If an overfill occurs, excess fluid
should be removed by a qualified
technician. 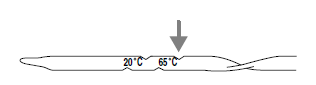
An overfill condition of transmission fluid may cause shift and/or engagement concerns and/or possible damage.
Do not use supplemental transmission fluid additives, treatments or cleaning agents. The use of these materials may affect transmission operation and result in damage to internal transmission components.
Checking and adding manual transmission fluid (if equipped)
1. Clean the filler plug.
2. Remove the filler plug and inspect the fluid level.
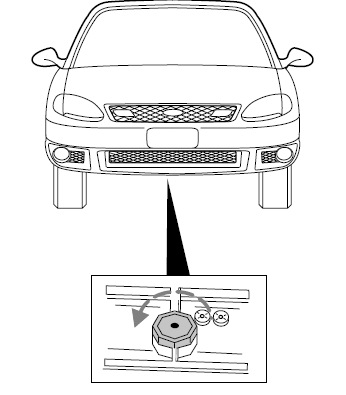
3. Fluid level should be at the bottom of the opening.
4. Add enough fluid through the filler opening so that the fluid level is at the bottom of the opening.
5. Install and tighten the fill plug securely.
Use only fluid that meets Ford specifications. Refer to Lubricant Specifications in this chapter.
See also:
Centre console - removal and refitting
Models up to 1990
Full length console
1 Where applicable, prise the electric window
switches from the front upper console panel
and disconnect the wiring.
2 Remove the three securing screws from ...
Servicing your tires
Checking the tire pressure
Use an accurate tire pressure gauge.
Check the tire pressure when tires are cold, after the vehicle has been
parked for at least one hour or has been driven less tha ...
Accelerator pedal - removal and refitting
Removal
1 The pedal can be removed once the throttle
cable has been disconnected from it as
described in Section 7.
2 Undo the two pedal support bracket
retaining bolts and remove the pedal.
Ref ...
