Radiator - removal and refitting
Removal
1 Disconnect the battery negative lead.
2 Drain the cooling system.
3 If not already done, disconnect the bottom hose from the radiator.
4 Disconnect the top hose and the expansion tank hose from the radiator.
5 On automatic transmission models, place a suitable container beneath the fluid cooler pipe connections at the radiator. Unscrew the union and plug the upper pipe, then repeat the procedure on the lower pipe.
6 Apply the handbrake, jack up the front of the vehicle and support on axle stands (see “Jacking and Vehicle Support”).
7 To improve access, remove the cooling fan shroud as follows, according to model.
8 On SOHC models, remove the four retaining clips and unscrew the two retaining screws, then withdraw the upper section of the fan shroud. Unclip and remove the lower section of the shroud.
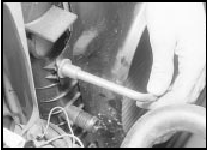
9 On CVH and DOHC models, unclip the wiring connector from the fan motor(s) then unscrew the retaining nuts and washers, and withdraw the fan shroud(s) and cooling fan assembly(s) (see illustration).

5.9 Unscrew the fan shroud/radiator retaining nuts
10 On early models, unscrew and remove the upper radiator mounting nuts and washers (see illustration).

5.10a Radiator and cooling fan shroud upper mountings
A Radiator mounting nut
B Shroud securing screw
C Shroud securing clips
D Radiator top hose clip
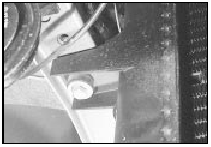
Unscrew and remove the lower mounting bolts and washers and withdraw the radiator from under the vehicle (see illustration).

5.10b Lower radiator mounting bolt
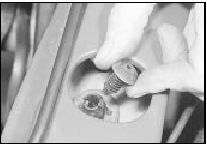
11 On all later models, the radiator is secured to the engine compartment front panel using clips and locking pegs. To release the top of the radiator, work through the cut-outs in the engine compartment front panel and remove the two radiator upper locking pegs (see illustration).

5.11Removing a radiator upper locking peg
Working under the front of the vehicle, remove the two radiator lower mounting bolts. Support the radiator from underneath. Squeeze the upper radiator locking pegs to release them from the engine compartment front panel and lower the radiator assembly from the vehicle.
Refitting
12 Refitting is a reversal of removal, bearing
in mind the following points.
13 Refill the cooling system.
14 On automatic transmission models, check and if necessary top-up the transmission fluid level.
Radiator - inspection and cleaning
1 If the radiator has been removed because of suspected blockage, reverse-flush it.
2 Clean dirt and debris from the radiator fins using an air jet or water and a soft brush. Be careful not to damage the fins or cut your fingers.
3 A radiator specialist can perform a “flow test” on the radiator to establish whether an internal blockage exists.
4 A leaking radiator must be referred to a specialist for permanent repair. Do not attempt to weld or solder a leaking radiator, as damage to the plastic parts may result.
5 In an emergency, minor leaks from the radiator can be cured by using a sealant.
See also:
Coolant pump/alternator drivebelt tensioner (DOHC models with power
steering) - removal and refitting
Removal
1 Remove the alternator drivebelt.
2 Loosen the alternator lower mounting
through-bolt, then remove the alternator
upper mounting bolt and swing the alternator
away from the engine.
3 Un ...
Fuel filter renewal - fuel injection engines (Every 24 000
miles or 2 Years)
Warning: This procedure may
result in some fuel spillage. Before
carrying out any operation on the
fuel system refer to the
precautions given in Safety First! at the
beginning of this manual and ...
Air Charge Temperature (ACT) sensor - removal and refitting
Removal
1 The air charge temperature sensor is
screwed into the inlet manifold (see
illustration).
14.1 Air charge temperature sensor - 1.6 EFI engine
A Wiring plug B Sensor
2 Disconnect the b ...
