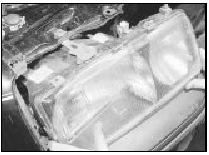
Headlamp unit - removal and refitting
1 Disconnect the battery negative lead.
2 Remove the radiator grille panel.
Models up to 1987
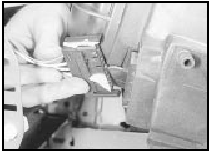
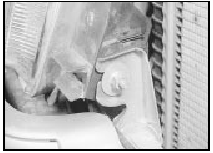
3 Disconnect the headlamp wiring plug(s)
see illustration).
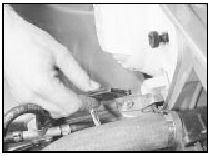
41.3 Disconnect the headlamp wiring plug - models up to 1987
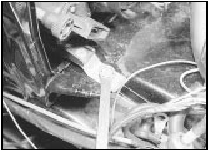
4 Remove the three or four headlamp securing bolts, as applicable, and the lower sliding clamp bracket bolt on the rear of the headlamp, then withdraw the headlamp (see illustrations).
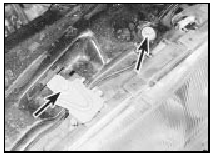
41.4a Remove the upper headlamp securing bolts (arrowed) . . .
41.4b . . . the rear securing bolt . . .
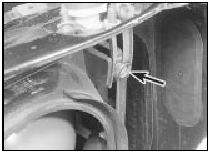
41.4c . . . and the lower sliding clamp bracket bolt . . .
41.4d . . . then withdraw the headlamp unit - models up to 1987
5 If required, the headlamp lens can be removed by releasing the spring clips around its edge.
6 Refitting is a reversal of removal, but the headlamp securing bolts should not be tightened until the headlamp is aligned with the front grille panel.
7 On completion, check the headlamp alignment.
Models from 1987
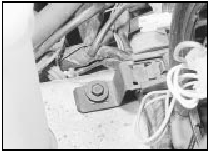
8 Disconnect the headlamp wiring plug(s)
(see illustration).
41.8 Disconnect the headlamp wiring plug - models from 1987
9 Where applicable, remove the headlamp wiper motor.
10 Remove the headlamp securing bolt and the two nuts, then release the anchor spring and withdraw the direction indicator !amp unit (see illustrations).
41.10a Remove the headlamp rear securing bolt . . .
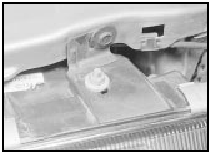
41.10b . . . the upper securing nut . . .
41.10c . . . and the side securing nut - models from 1987
11 Pull the headlamp forwards, then swivel it and remove it sideways.
12 If required, the headlamp lens can be removed by releasing the spring clips around its edge.
13 Refitting is a reversal of removal.
14 On completion, check the headlamp alignment.
See also:
Battery
Your vehicle is equipped with a
Motorcraft maintenance-free battery
which normally does not require
additional water during its life of
service.
However, for severe usage or in high temperature ...
Ignition timing (OHC models) - adjustment
Note: During production the ignition timing is
accurately set using a microwave process,
and sealant is applied to the distributor clamp
bolt. Because the electronic components
require no maintena ...
Crankshaft front oil seal - renewal
Note: A new gasket will be required for
refitting if the old seal housing is removed
during this procedure.
1 Remove the timing belt and the crankshaft
sprocket.
2 If an oil seal removal tool is ...
