Headlamps - alignment
1 It is recommended that the headlamp alignment is carried out by a Ford dealer using specialist beam setting equipment. However, in an emergency the following procedure will provide an acceptable light pattern.
2 With the vehicle unladen, with a full tank of fuel, and with the tyres correctly inflated, position the vehicle approximately 10 metres (33 feet) in front of, and at right-angles to, a wall or garage door.
3 Draw a vertical line on the wall corresponding to the centre line of the car.
The position of the line can be ascertained by marking the centre of the front and rear screens with crayon then viewing the wall from the rear of the car.
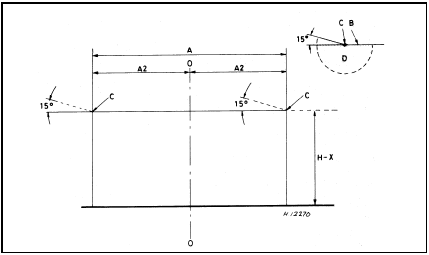
4 Complete the lines shown (see illustration).

42.4 Headlamp alignment chart
A Distance between headlamp centres
B Light/dark boundary
C Centre of dipped beam
D Dipped beam pattern
H Height of headlamp centre from ground
X = 160.0 mm (6.3 in) for all models up to 1987
120.0 mm (4.7 in) for all models from 1987
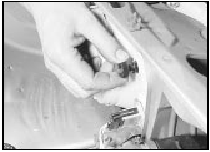
5 Switch the headlamps on dipped beam and adjust them as necessary using the knobs located behind the headlamps (see illustration). Cover the headlamp not being checked with cloth.

42.5 Adjusting the headlamp alignment
See also:
General description
The independent front suspension is of the
MacPherson strut type, incorporating coil
springs and integral telescopic shock
absorbers. Lateral location of each strut
assembly is by a forged or pres ...
Servicing Specifications
Engine
Oil filter type . . . . . . . . . . . . . . . . . . . . . . . . . . . . . . . .
. . . . . . . . . . . . . . Champion C104
Valve clearances (cold):
OHV engines:
Inlet . . . . . . . . . . . ...
Final drive oil level check (Every 12 000 miles (20 000 km) or 12 months)
1 Check the final drive oil level as follows.
2 Position the vehicle over a pit, or raise it at
front and rear on ramps or axle stands. The
vehicle must be level.
3 Wipe clean around the final dri ...
