Steering wheel - removal and refitting
Removal
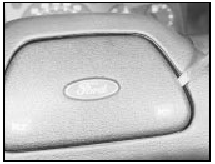
1 According to model, either pull off the
steering wheel trim, prise out the insert which
carries the Ford motif at the centre, or carefully
prise up and lift off the horn push followed by
the contact plate (see illustrations).
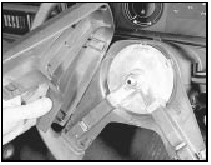
22.1a Steering wheel trim removal
22.1b Prising up the steering wheel horn push . . .
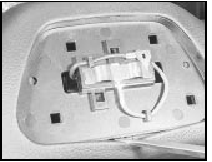
22.1c . . . followed by the contact plate
2 Insert the ignition key and turn it to position I.
3 Hold the steering wheel from turning and have the front roadwheels in the straightahead attitude. Unscrew the steering wheel retaining nut using a socket and extension.
4 Withdraw the steering wheel from the shaft.
No great effort should be necessary, as the wheel is located on a hexagonal-section shaft, which does not normally cause the binding associated with splined shafts. However, if difficulty is experienced, a puller may be used to withdraw the wheel - take adequate precautions to avoid damage to the finish.
5 Where applicable note the steering shaft direction indicator cam which has its peg uppermost.
Refitting
6 Refitting is the reverse sequence to
removal. Ensure that the direction indicator
switch is in the neutral position (this will avoid
the possibility of damage to the selfcancelling
mechanism). Check that the
roadwheels are still in the straight-ahead
position and locate the steering wheel with
the larger section between the spokes
uppermost. Tighten the steering wheel
retaining nut to the specified torque.
See also:
Cylinder head and pistons - decarbonising
OHV engines
1 With the cylinder head removed (Section 4),
the carbon deposits should be removed from
the combustion spaces using a scraper and a
wire brush fitted into an electric drill. Take care ...
Power steering gear - removal and refitting
Note: New power steering fluid hose O-rings
will be required when refitting.
Removal
1 The procedure is as described for manual
steering gear with the following differences
(see illustration).
...
Braking system
General information and precautions
General information
The braking system is of the dual circuit
hydraulic type. The front and rear circuits are
operated independently from a tandem
master cylin ...
