Carburettor (Ford VV type) - removal and refitting
Caution: Refer to the precautions in Section 1 before proceeding.
Note: A new gasket must be used when refitting the carburettor. A tachometer and an exhaust gas analyser will be required to check the idle speed and mixture on completion.
Removal
1 Disconnect the battery negative lead.
2 Remove the air cleaner.
3 Relieve the pressure in the cooling system by unscrewing the expansion tank cap. If the engine is warm, place a thick rag over the cap and unscrew the cap slowly as a precaution against scalding. Refit the cap after relieving the pressure.
4 Identify the automatic choke coolant hose locations, as an aid to refitting, then disconnect the hoses (being prepared for coolant spillage.) Either plug the hoses or secure them with their ends facing upwards to prevent loss of coolant.
5 Disconnect the wiring from the antidieselling (anti-run-on) valve.
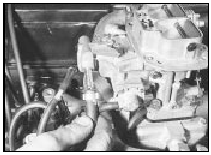
6 Disconnect the fuel hose and vacuum pipe (see illustration). Plug the end of the fuel hose to minimise petrol spillage.

14.6 Disconnecting the fuel hose - Ford VV carburettor
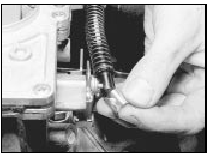
7 Disconnect the throttle cable from the carburettor throttle lever (see illustration).

14.7 Disconnecting the throttle cable from the throttle lever - Ford VV
carburettor
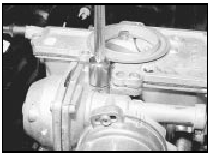
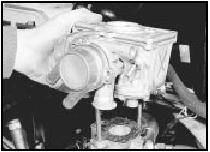
8 Remove the two securing nuts and washers, and lift the carburettor from the inlet manifold studs (see illustrations). Recover the gasket.

14.8a Remove the securing nuts and washers . . .

14.8b . . . and lift the carburettor from the inlet manifold - Ford VV
carburettor
Refitting
9 Refitting is a reversal of removal, bearing in
mind the following points.
10 Ensure that the mating faces of the inlet manifold and carburettor are clean, and use a new gasket.
11 Ensure that the coolant hoses, fuel hose, and vacuum pipe are correctly routed and free from restrictions. If any of the hoses were originally secured with crimped type clips, discard these and use new worm drive clips on refitting.
12 On completion, check and if necessary top-up the coolant level. Check and if necessary adjust the idle speed and mixture.
Carburettor (Ford VV type) - idle speed and mixture adjustment
Refer to Chapter 1, Sections 15 and 16.
Carburettor (Weber 2V type) - removal and refitting
1 Proceed as described for the Ford VV carburettor but note the following.
2 On models with an electrically-heated automatic choke, ignore all references to the cooling system and coolant hoses.
3 Not all Weber carburettors are fitted with an anti-dieselling valve.
4 Disconnect all relevant wiring plugs and vacuum pipes, if necessary noting their locations for use when refitting.
5 Disconnect the link arm from the throttle linkage instead of disconnecting the throttle cable.
6 The carburettor is secured to the inlet manifold by four nuts and washers.
Carburettor (Weber 2V type) - idle speed and mixture adjustment
Refer to Chapter 1, Sections 15 and 16.
See also:
Camshaft - removal and refitting
Carburettor engines
Note: Thread locking compound will be
required to coat the camshaft sprocket bolt on
refitting.
Removal
1 Disconnect the battery negative lead.
2 Refer to the relevant Part o ...
Seat belt check (Every 6000 miles or 6 months)
1 Periodically check the belts for fraying or
other damage. If evident, renew the belt.
2 If the belts become dirty, wipe them with a
damp cloth using a little detergent only.
3 Check the tightnes ...
What you should know about automotive fuels
Important safety precautions
Do not overfill the fuel tank. The pressure in an overfilled tank
may cause leakage and lead to fuel spray and fire.
The fuel system may be under pressure. If the fue ...
