Deceleratio sensitive valve (all models with conventional braking system) - removal and refitting
Caution: Refer to the precautions in Section 1.
Removal
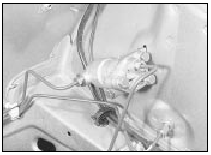
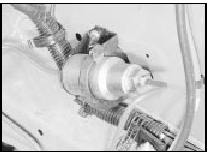
1 The deceleration sensitive valve is located on the left-hand side of the engine compartment (see illustrations).

23.1a Early type deceleration sensitive valve

23.1b Later type deceleration sensitive valve
2 Place a suitable container beneath the valve to catch spilt fluid, then unscrew the union nuts and disconnect the fluid pipes.
Plug the open ends of the pipes and valve to prevent fluid leakage and dirt ingress. If fluid is accidentally spilt on the paintwork, wash off immediately with cold water.
3 On early models, the valve is secured to the mounting bracket on the inner wing by a single bolt. Unscrew the bolt and remove the valve.
4 On later models, the valve is secured to the mounting bracket by a clip. Remove the clip and slide out the valve.
Refitting
5 Refitting is a reversal of removal, but note that the early type of
valve must be fitted with the cover bolts facing forwards, and the later
type of valve must be fitted with the smaller diameter stepped end
facing forwards.
6 On completion, bleed the rear hydraulic circuit.
See also:
Air cleaner - removal and refitting
Removal
1 On CVH models, disconnect the battery
negative lead.
2 Remove the screws from the top of the air
cleaner cover (see illustration).
3.2 Air cleaner securing screws (arrowed)
3 Disconn ...
Door - removal and refitting
Front door
1 On models with electric mirrors, electric
windows, central-locking, door-mounted
speakers, or “door ajar” sensors, remove the
trim panel and disconnect the wiring inside
the door. Wi ...
Steering wheel - alignment
1 Owing to the fact that the steering wheel is
located on a hexagon shaped steering shaft, it
may be difficult to obtain perfect steering wheel
alignment due to lack of fine adjustment.
2 It is th ...
