Exterior lamp bulbs - renewal
Note: The glass envelopes of the headlamp, auxiliary driving lamp and front foglamp bulbs must not be touched with the fingers. If the glass is accidentally touched, it should be washed with methylated spirits and dried with a soft cloth. Failure to observe this procedure may result in premature bulb failure.
1 Disconnect the battery negative lead.
Headlamps
2 Working in the engine compartment,
remove the headlamp rear cover by turning it
anti-clockwise (see illustration).
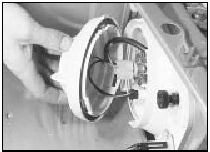
48.2 Remove the headlamp rear cover
3 Pull the wiring plug from the base of the bulb, then release the spring clip, grasp the bulb by its contacts and carefully withdraw it (see illustrations). Do not touch the bulb glass.
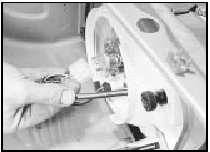
48.3a Pull off the wiring plug . . .
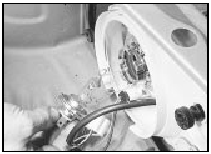
48.3b Release the spring clip and withdraw the headlamp bulb
4 Refitting is a reversal of removal, but on models up to 1987, refit the headlamp rear cover by aligning the arrow on the cover with the depression on the top of the headlamp unit and turning the cover clockwise until the arrow aligns with the lower depression. On models from 1987, the word “OBEN “ or “TOP” on the rear cover should be exactly at the top after refitting.
Sidelamps
5 Working in the engine compartment,
remove the headlamp rear cover by turning it
anti-clockwise.
6 Pull the sidelamp bulbholder from its location in the headlamp reflector (see illustration). On “high specification” models up to 1987 a retaining tab must be depressed before withdrawing the bulbholder. Note that the rubber sleeve should be left in position in the reflector.
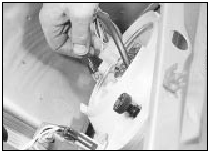
48.6 Removing a sidelamp bulbholder
7 Refitting is as described in paragraph 4.
Auxiliary driving lamps
Models up to 1987
8 Twist the cover on the top of the headlamp
unit anti-clockwise and remove it to expose
the bulb (see illustration).
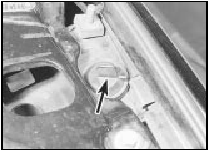
48.8 Auxiliary drive lamp bulb cover (arrowed) - models up to 1987
9 Release the bulb from the two clips, then disconnect the wiring and remove the bulb.
Do not touch the bulb glass (see illustration).
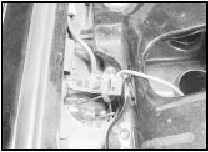
48.9 Withdraw the auxiliary driving lamp bulb from the headlamp unit - models
up to 1987
10 Refitting is a reversal of removal.
Models from 1987
11 Release the spring clip securing the cover
to the rear of the headlamp unit, then remove
the cover (see illustration).
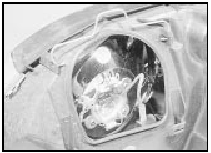
48.11 Auxiliary driving lamp bulb location - models from 1987
12 Disconnect the wiring from the bulb, then release the spring clip and withdraw the bulb.
Do not touch the bulb glass.
13 Refitting is a reversal of removal.
Front direction indicator lamps
Models up to 1987
14 Remove the lamp unit.
15 Twist the bulbholder anti-clockwise and withdraw it from the rear of the lamp. The bulb is a bayonet fit in the bulbholder (see illustration).
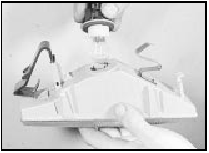
48.15 Removing a front direction indicator lamp bulb - models up to 1987
16 Refitting is a reversal of removal.
Models from 1987
17 Remove the lamp unit.
18 Release the bulbholder by pressing it and turning clockwise, then withdraw the bulb from the bulbholder (see illustration).
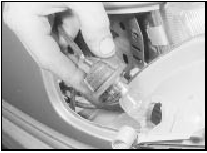
48.18 Removing a front direction indicator lamp bulb - models from 1987
19 Refitting is a reversal of removal.
Front direction indicator side
repeater lamps
Models up to 1987
20 To improve access, turn the steering onto
full lock.
21 Remove the relevant wheel arch liner.
22 Working under the wheel arch, twist the bulbholder anti-clockwise and withdraw it from the lamp. The bulb is a push-fit in the bulbholder.
23 Refitting is a reversal of removal.
Models from 1987
24 Remove the lamp unit.
25 Twist the bulbholder anti-clockwise to remove it from the lamp. The bulb is a push-fit in the bulbholder.
26 Refitting is a reversal of removal.
Front foglamps
27 Remove the foglamp.
28 On models up to 1987, remove the bulb cover from the rear of the lamp, then release the two spring clips, disconnect the wiring and withdraw the bulb. Do not touch the bulb glass.
29 On models from 1987, release the spring clip and pull the bulb from the bulbholder. Do not touch the bulb glass (see illustration).
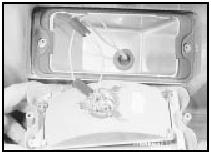
48.29 Front foglamp bulb retaining spring clip - models from 1987
30 Refitting is a reversal of removal.
Rear lamp unit
Saloon and Hatchback models
31 Working inside the luggage compartment,
press the plastic retaining tab and remove the
bulbholder assembly. The bulbs are a bayonet
fit in the bulbholder (see illustrations).
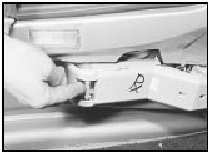
48.31a Press the plastic retaining tab to release the rear lamp bulbholder
assembly - Saloon and Hatchback models
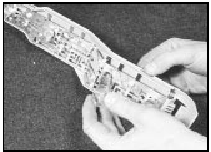
48.31b Removing a bulb from the rear lamp bulbholder - Saloon and Hatchback
models
32 Refitting is a reversal of removal.
Estate models
33 Working inside the luggage compartment,
turn the retaining tabs a quarter-turn and
remove the rear side trim panel cover.
34 Push out the retaining tabs and withdraw the bulbholder. The bulbs are a bayonet fit in the bulbholder.
35 Refitting is a reversal of removal.
P100 models
36 Remove the two securing screws and
detach the rear lamp wiring cover from the
side of the cargo area.
37 Working through the cargo area aperture, unscrew the two wing nuts and remove the rear lamp cover.
38 Twist the relevant bulbholder anticlockwise to remove it from the lamp. The bulb is a bayonet fit in the bulbholder.
39 Refitting is a reversal of removal, but ensure that the wiring protective sheath is seated correctly in the opening in the lamp cover.
Rear number plate lamp
Saloon, Hatchback and Estate models
40 Remove the lamp unit.
41 Twist the bulbholder anti-clockwise to remove it from the lamp. The bulb is a push-fit in the bulbholder (see illustration).
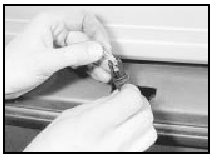
48.41 Removing a rear number plate lamp bulb - Saloon, Hatchback and Estate
models
42 Refitting is a reversal of removal.
P100 models
43 Pull the lamp cover from the rubber
housing to expose the bulb. The bulb is a
bayonet fitting in the bulbholder.
44 Refitting is a reversal of removal.
See also:
Turbocharger-to-manifold nut check - RS Turbo models (Every 12
000 miles or 12 months)
Check the tightness of the turbocharger-toexhaust
manifold securing nuts using a torque
wrench. ...
General information
The 1.1 litre, 1.3 litre, 1.4 litre and 1.6 litre
CVH (Compound Valve angle, Hemispherical
combustion chambers) engines are of four
cylinder in-line overhead camshaft type,
mounted transversely, t ...
Front foglamps - removal and refitting
1 Disconnect the battery negative lead.
Models up to 1987
2 Remove the relevant front direction
indicator lamp unit.
3 Release the retaining catch on the inside
edge of the lamp, then withdraw th ...
