Door trim panel - removal and refitting
Pre-1986 models
Removal
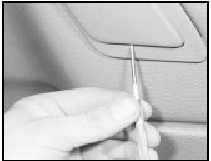
1 On Ghia versions only, remove the panel
capping by carefully prising out the retaining
clips using a forked tool. This can easily be
made from a piece of scrap metal.
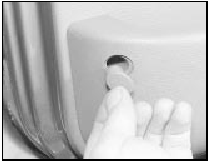
2 Remove the door window regulator handle.
Do this by prising out the plastic insert from the handle and extracting the screw which will now be exposed (see illustrations).
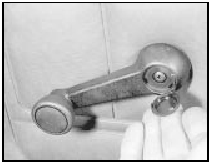
11.2a Prise out the plastic insert . .
11.2b . . . and unscrew the regulator handle
3 On vehicles fitted with electrically operated front windows, pull out the switches and remove the door pocket finisher.
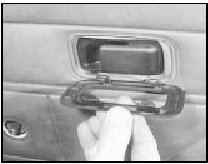
4 Remove the door pull/armrest. This is held by two screws (see illustration). On Base models with a door pull only, the end caps will have to be prised up to reveal the screws.
11.4 Unscrew the armrest
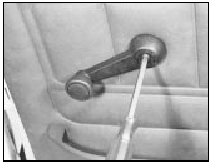
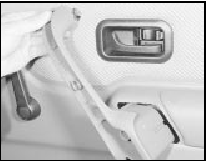
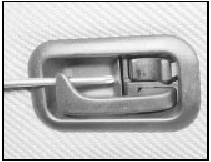
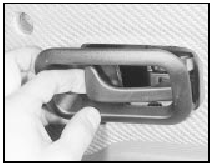
5 Push the door lock remote control handle bezel towards the rear of the vehicle to release it from its retaining lugs (see illustration).
11.5 Removing the remote control handle bezel
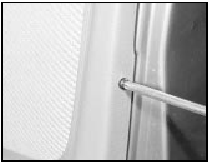
6 Again using the forked tool, pass it round the edge of the panel between the panel and the door and release each of the panel clips in turn. Lift the panel from the door (see illustration).

11.6 Removing the door trim panel
Refitting 7 Refitting is a reversal of removal.
1986 models onwards
Removal
8 Remove the door window regulator handle.
Do this by prising out the plastic insert from the handle and extracting the screw now exposed.
Remove the washer from behind the handle.
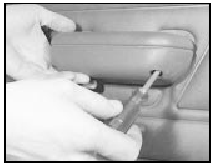
9 Prise off the door pull handle capping, undo the three screws and remove the handle (see illustrations). On vehicles with electrically operated windows, pull out the switches and disconnect the wiring.
11.9a Prise out the door pull handle capping . . .
11.9b . . . undo the screws . . .
11.9c . . . and remove the handle
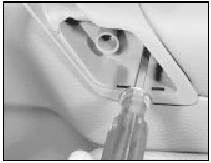
10 Undo the door lock remote control handle bezel retaining screw and remove the bezel (see illustrations).
11.10a Undo the remote control handle bezel retaining screw . . .
11.10b . . . and remove the bezel
11 Prise out the plastic trim cap and unscrew the lower front panel retaining screw.
Unscrew the three remaining screws, one at the upper front and two at the rear of the panel (see illustrations).
11.11a Release the trim cap and undo the screw . . .
11.11b . . . followed by the side screws
12 Carefully release the retaining clips at the top of the panel and lift upwards to disengage the lower brackets.
13 From 1989, a new foam watershield is fitted under the door trim panel, secured in position by a strip of butyl.
14 To remove the watershield, the butyl strip must not be touched with the hands or subsequent adhesion will be impaired.
15 If the foam watershield is damaged beyond re-use on removal, all traces of it, and the butyl, must be removed from the door inner skin. The butyl can be removed by “rolling” it up on itself to form a ball.
16 New butyl strips can then be applied and a new watershield fitted. Use a roller to press the shield into contact with the butyl strip.
Refitting
17 Refitting is a reversal of removal.
See also:
Idle speed control valve - removal and refitting
Note: A new gasket must be used when
refitting the valve.
2.0 litre SOHC models
1 Disconnect the battery negative lead.
2 Disconnect the idle speed control valve
wiring plug by releasing the reta ...
Tailgate/boot lid lock and cylinder - removal and refitting
Removal
1 Remove the trim panel as described in
Section 32.
2 Extract the lock cylinder retaining clip,
disconnect the control rods and remove the
cylinder.
3 Undo the three screws and detach th ...
Spark plug renewal (Every 12 000 miles or 12 months)
The procedure is as described for RS Turbo
models in Section 15. ...
