Pistons and connecting rods - removal and refitting
Note: New connecting rod bolts and a new oil pick-up pipe gasket must be used on refitting.
Removal
1 Remove the sump and the cylinder head.
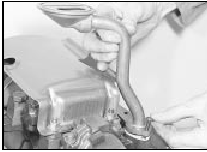
2 Unscrew the two securing bolts, and remove the oil pick-up pipe (see illustration).

29.2 Removing the oil pick-up pipe
Recover the gasket.
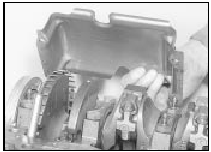
3 Unscrew the four securing nuts, and withdraw the oil baffle from the studs on the main bearing caps (see illustration).

29.3 Withdrawing the oil baffle
4 Proceed as described in Chapter 2, Part A, Section 32, paragraphs 2 to 5.
Refitting
5 Proceed as described in Chapter 2, Part A,
Section 32, paragraphs 6 to 13, noting the
following points:
6 Take note of the orientation of the bearing
shells during dismantling, and ensure that
they are fitted correctly during reassembly.
7 When fitting the pistons, ensure that the arrow on the piston crown and the letter “F” on the face of the connecting rod are pointing towards the front of the engine.
8 Use new connecting rod bolts on reassembly, and before fitting, oil the threads and the contact faces of the bolts. Tighten the bolts in the three stages given in the Specifications at the beginning of this Chapter.
9 Refit the oil baffle, and tighten the securing nuts.
10 Clean the mating faces of the cylinder block and the oil pick-up pipe, and refit the pick-up pipe using a new gasket.
11 Refit the cylinder head and the sump.
See also:
Brake fluid pipes and hoses - removal and refitting
Caution: Refer to the
precautions in Section 1.
Removal
1 To remove a flexible hose, always free it
from any mounting bracket(s) first by prising
out the U-shaped retaining clip, and then
using ...
Instrument Cluster
Warning lights and chimes
Warning lights and gauges can alert you to a vehicle condition that may
become serious enough to cause expensive repairs. A warning light may
illuminate when a problem ...
Brake disc - examination, removal and refitting
Note: From 1987, thicker brake discs were
fitted. If the later discs are fitted to earlier
models, longer wheel studs must be fitted to
accommodate the increased thickness.
Consult a dealer for fu ...
