Heater unit - overhaul
1 With the heater unit removed from the vehicle, remove the two securing screws and withdraw the heater matrix from the casing (see illustrations).
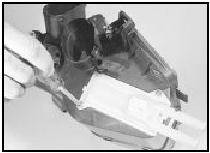
19.1a Remove the securing screws . . .
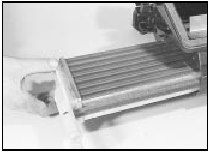
19.1b . . . and withdraw the heater matrix
2 Cut the heater casing gasket in line with the casing joint, then use two suitable screwdrivers to prise off the retaining clips and separate the casing halves. Withdraw the lower part of the casing to the side.
3 Remove the air flap valves, then press the control levers from the casing. Note that the “up/down” control lever can only be removed when the marks are aligned as shown (see illustration).
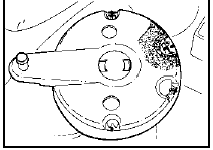
19.3 Heater “up/down” control lever must be aligned as shown before removal
Note that the cross marks are for right-hand drive vehicles
4 Clean all components and hose through the matrix to remove any debris. If necessary use a chemical cleaner to clear the inner passage of the matrix. Renew the components as necessary.
5 Reassembly is a reversal of dismantling.
See also:
Air bag supplemental restraint system (SRS)
Important SRS precautions
The SRS is designed to work with
the safety belt to help protect the
driver and right front passenger
from certain upper body injuries. Air
bags DO NOT inflate slowl ...
Speed sender unit - removal and refitting
The sender unit is similar to that used with
the fuel computer described in Chapter 12. ...
Ignition system component check (Every 24 000 miles (40 000 km) or 2 years)
1 Before disturbing any part of the ignition
system, disconnect the battery negative lead.
2 Identify and clearly mark all HT leads before
disconnecting them from the spark plugs.
3 Refer to the a ...
