Coil - testing, removal and refitting
Testing
All models except 1.6 and 1.8 litre
CVH (R6A type)
1 The coil is located on the left-hand side of
the engine compartment and is retained by a
metal strap (see illustration). It is of high
output type and the HT tower should be kept
clean at all times to prevent possible arcing.
Bosch and Femsa coils are fitted with protective plastic covers and Polmot coils are fitted with an internal fusible link.
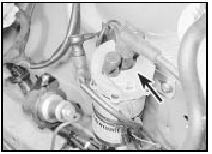
12.1 Ignition coil - CVH model. Plastic cover arrowed
2 To ensure that the correct HT polarity at the spark plugs, the LT coil leads must always be connected correctly. The black lead must always be connected to the terminal marked + 115, and the green lead to the terminal marked /1. Incorrect connections can cause poor starting, misfiring, and short spark plug life.
3 To test the coil first disconnect the LT and HT leads. Connect an ohmmeter between both LT terminals and check that the primary winding resistance is as given in the Specifications. Connect the ohmmeter between the HT terminal and either LT terminal and check that the secondary winding resistance is as given in the Specifications. If either winding resistance is not as specified, the coil should be renewed.
Reconnect the LT and HT leads on completion.
1.6 and 1.8 litre (R6A type) CVH
models
4 The coil fitted to these models is located
towards the front right-hand side of the
cylinder block (see illustration).
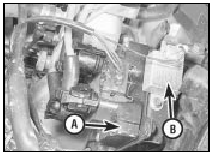
12.4 Ignition coil (A) and suppressor (B) viewed from under vehicle (shroud
removed)
5 Testing of the coil should be entrusted to a Ford dealer or a suitable specialist.
Removal
All models except 1.6 and 1.8 litre
CVH (R6A type)
6 Disconnect the battery negative lead,
7 Disconnect the LT and HT leads from the
coil (see illustration).
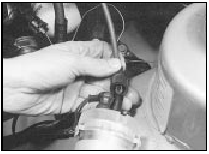
12.7 Disconnecting the HT lead from the coil
8 Remove the securing screw(s) and detach the coil and strap assembly from the body panel. Note that on models with the ESC system, the coil strap is secured by the top ESC module securing screw. On certain models with the ESC II or EEC IV systems, an “octane adjustment” service lead may be connected to one of the coil securing screws.
On 2.0 litre DOHC fuel-injected models, the coil/ignition module heat shield must be removed for access to the coil securing bolts.
The heat shield is secured by two screws.
Note that on certain models, an earthing lead and/or a suppressor may be secured by one of the coil securing bolts (see illustrations).
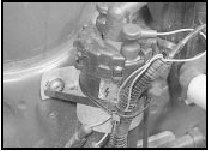
12.8a Ignition coil viewed with heat shield removed
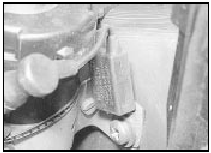
12.8b Suppressor secured by one of the coil securing bolts
1.6 and 1.8 litre (R6A type) CVH
models
9 Disconnect the battery negative lead.
10 Remove the two securing screws, and withdraw the plastic ignition module shroud.
11 Disconnect the ignition coil wiring plug and, where fitted, the suppressor wiring plug, pulling on the plugs, not on the wiring (see illustrations).
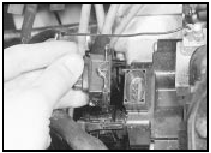
12.11a Disconnecting the coil wiring plug . . .
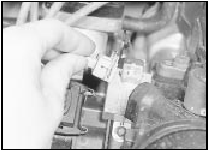
12.11b . . . and the suppressor wiring plug
12 Release the securing lugs, and disconnect the HT leads from the coil, noting their locations to aid refitting.
13 Remove the four Torx screws, and withdraw the coil from the cylinder block.
Refitting
14 Refitting is a reversal of removal, but
ensure that all leads are securely connected.
See also:
Instrument Cluster
Warning lights and chimes
Warning lights and gauges can alert you to a vehicle condition that may
become serious enough to cause expensive repairs. A warning light may
illuminate when a problem ...
Ignition HT coil - testing, removal and refitting
Note: Refer to the precautions given in
Section 1 before proceeding.
All except models with DIS
ignition system
Testing
1 Accurate checking of the coil output
requires the use of special test eq ...
Dimensions and Weights
Note: All figures are approximate, and may vary according to
model. Refer to manufacturer’s data for exact figures.
Dimensions
Overall length:
Pre-1986 models:
Saloon and Cabriolet . . . . . . . ...
