Rear shock absorber - removal and refitting
Saloon and Hatchback models 1 With the weight of the vehicle resting on the roadwheels, work under the vehicle to unscrew and remove the shock absorber lower mounting bolt and nut from the relevant lower arm (see illustration). If desired, the rear of the vehicle can be raised on ramps to improve access.
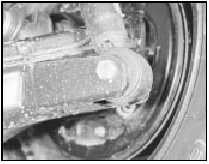
12.1 Rear shock absorber lower mounting - Saloon and Hatchback models
2 Working inside the rear of the vehicle, remove the trim cover behind the side cushion. The cover is secured by two self-tapping screws (see illustrations).
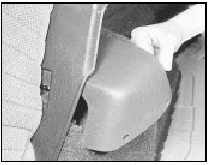
12.2a Remove the trim cover . . .
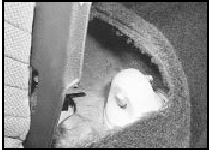
12.2b . . . for access to the rear shock absorber upper mounting
3 With an assistant supporting the shock absorber from below, unscrew and remove the upper mounting bolt and nut. Withdraw the shock absorber from under the vehicle.
4 Refitting is a reversal of removal. Tighten the mounting bolts securely.
Estate models
Note: On models fitted with heavy duty
Nivomat shock absorbers, follow the
procedure given in Section 13, as the shock
absorber and coil spring are an integrated unit.
5 With the weight of the vehicle resting on the roadwheels, work under the vehicle to unscrew and remove the two shock absorber lower mounting bolts from the relevant lower arm (see illustration). If desired, the rear of the vehicle can be raised on ramps to improve access.
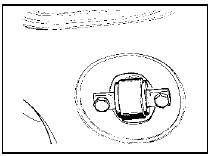
12.5 Rear shock absorber lower mounting bolts - Estate models
6 Working inside the rear of the vehicle, fold down the rear seat backrest, fold back the floor covering and remove the front section of the luggage compartment floor, which is secured with 12 self-tapping screws.
7 With an assistant supporting the shock absorber from below, unscrew and remove the upper mounting nut and washer (see illustration). Withdraw the shock absorber from under the vehicle.
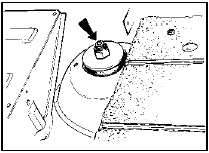
12.7 Rear shock absorber upper mounting (arrowed) - Estate models
8 Refitting is a reversal of removal. Tighten the mounting bolts and nut securely.
P100 models
9 With the weight of the vehicle resting on the
roadwheels, work under the vehicle to
unscrew and remove the shock absorber
lower mounting nut, washer, and rubber
insulator. If desired, the rear of the vehicle can
be raised on ramps to improve access.
10 Unscrew and remove the top mounting bolt, nut and washer from the chassis crossmember. Withdraw the shock absorber upwards.
11 Refitting is a reversal of removal. Tighten the mounting bolt and nut securely.
See also:
Cylinder head - removal and refitting
Removal
Note: On HCS engines, cylinder head bolts
may be used a total of three times (including
initial fit) and must be suitably marked to
indicate each removal operation. A new
cylinder head ga ...
Valve clearance adjustment - OHV and HCS engines (Every 12 000
miles or 12 months)
OHV engines
1 This operation should be carried out with
the engine cold and the air cleaner and rocker
cover removed.
2 Using a ring spanner or socket on the
crankshaft pulley bolt, turn the cran ...
Bumper - removal and refitting
Front bumper
Models up to 1987
1 Remove the radiator grille panel.
2 Disconnect the battery negative lead, then
disconnect the wiring plugs from the
indicators, and where applicable the
foglamps ...
