Headlamp unit - removal and refitting
1 Disconnect the battery negative lead.
2 Remove the radiator grille panel.
Models up to 1987
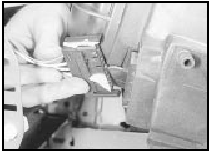
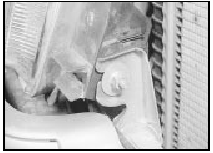
3 Disconnect the headlamp wiring plug(s)
see illustration).
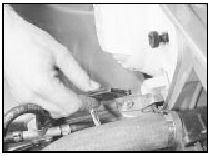
41.3 Disconnect the headlamp wiring plug - models up to 1987
4 Remove the three or four headlamp securing bolts, as applicable, and the lower sliding clamp bracket bolt on the rear of the headlamp, then withdraw the headlamp (see illustrations).
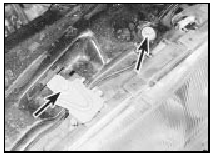
41.4a Remove the upper headlamp securing bolts (arrowed) . . .
41.4b . . . the rear securing bolt . . .
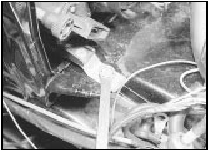
41.4c . . . and the lower sliding clamp bracket bolt . . .
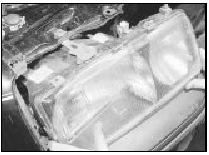
41.4d . . . then withdraw the headlamp unit - models up to 1987
5 If required, the headlamp lens can be removed by releasing the spring clips around its edge.
6 Refitting is a reversal of removal, but the headlamp securing bolts should not be tightened until the headlamp is aligned with the front grille panel.
7 On completion, check the headlamp alignment.
Models from 1987
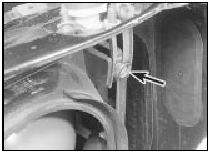
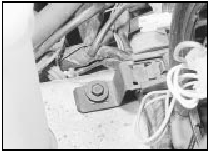
8 Disconnect the headlamp wiring plug(s)
(see illustration).
41.8 Disconnect the headlamp wiring plug - models from 1987
9 Where applicable, remove the headlamp wiper motor.
10 Remove the headlamp securing bolt and the two nuts, then release the anchor spring and withdraw the direction indicator !amp unit (see illustrations).
41.10a Remove the headlamp rear securing bolt . . .
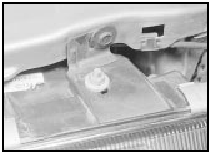
41.10b . . . the upper securing nut . . .
41.10c . . . and the side securing nut - models from 1987
11 Pull the headlamp forwards, then swivel it and remove it sideways.
12 If required, the headlamp lens can be removed by releasing the spring clips around its edge.
13 Refitting is a reversal of removal.
14 On completion, check the headlamp alignment.
See also:
Automatic transmission selector mechanism check (Every 12 000
miles or 12 months)
Carry out a thorough road test, ensuring
that all gearchanges occur smoothly without
snatching, and without an increase in engine
speed between changes. Check that all gear
positions can be engage ...
Battery - removal and refitting
Note: Refer to the precautions at the end of
Section 1 before proceeding.
Removal
1 The battery is located on the left-hand side
of the engine compartment on a bulkhead
platform.
2 Disconnect th ...
Steering wheel - removal and refitting
Removal
1 According to model, either pull off the
steering wheel trim, prise out the insert which
carries the Ford motif at the centre, or carefully
prise up and lift off the horn push followed by ...
