Engine/transmission mountings - removal and refitting
Pre-1986 models 1 The engine mountings can be removed if the weight of the engine/transmission is first taken by one of the three following methods.
2 Either support the engine under the sump using a jack and a block of wood, or attach a hoist to the engine lifting lugs. A third method is to make up a bar with end pieces which will engage in the water channels at the sides of the bonnet lid aperture. Using an adjustable hook and chain connected to the engine lifting lugs, the weight of the engine can be taken off the mountings.
Rear mountings
Removal
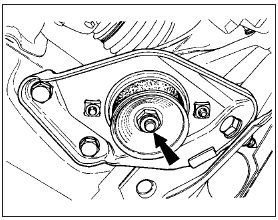
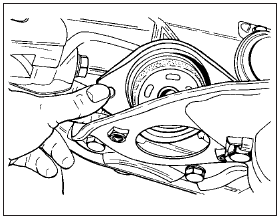
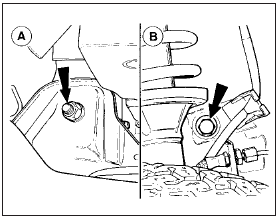
3 Unbolt the mounting, according to type from
the body member or panel, also from the engine
or transmission. With the mounting withdrawn,
the centre bolt can be unscrewed and the
flexible component detached (see illustrations).

9.3a Transmission left-hand rear mounting-to-bracket attachment - pre-1986
models

9.3b Removing transmission left-hand rear mounting - pre-1986 models

9.3c Right-hand rear engine mounting
attachments - pre-1986 models
A Mounting to side member B Mounting to inner wheel arch
Refitting 4 Refitting is a reversal of removal. Make sure that the original sequence of assembly of washers and plates is maintained.
Front left-hand mounting
Removal
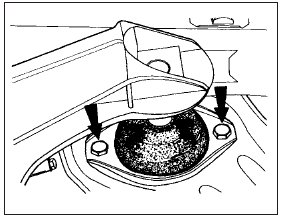
5 Removal of the front mounting on the
transmission requires a different removal
procedure. Remove the centre bolt from the
mounting and then using one of the methods
described, raise the transmission just enough
to be able to unbolt and remove the two
insulator bolts and withdraw the insulator (see
illustration).

9.5 Transmission left-hand front mounting attachments - pre-1986 models
Refitting 6 Refitting is a reversal of removal. Make sure that the original sequence of assembly of washers and plates is maintained.
1986 models onwards
Removal
7 From 1986 onwards a longitudinal
crossmember is mounted beneath the
transmission, and the front and rear left-hand
mountings are attached to it. Removal of the
rear right-hand mounting is as previously
described, but removal of the front and rear
left-hand mountings is as follows.
8 Support the engine; see paragraphs 1 and 2.
9 Undo the nuts securing the mountings to the transmission support crossmember and to the brackets on the transmission.
10 Unbolt the transmission support crossmember at the front and rear and remove it from under the car. Remove the relevant mounting.
Refitting
11 Refitting is the reversal of removal. Make
sure that the original sequence of assembly of
washers and plates is maintained.
See also:
Alternator - removal and refitting
Note: Refer to the precautions at the end of
Section 1 before proceeding.
Removal
1 The operations are similar for all makes of
alternator.
2 Disconnect the battery negative terminal,
then disco ...
Auxiliary drivebelt check (Every 12 000 miles (20 000 km) or 12 months)
1 Refer to the Specifications at the beginning
of this Chapter and check the tension of each
drivebelt at the point stated. Check the full
length of each drivebelt for cracks and
deterioration. It ...
Loudspeakers - removal and refitting
1 Disconnect the battery earth lead.
Facia panel-mounted speakers
Upper
2 Prise the speaker grille from its four
retaining clips in the facia using a thin-bladed
screwdriver.
3 Remove the four s ...
