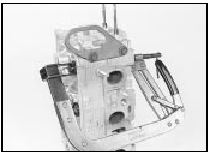
Cylinder head - dismantling and reassembly
Note: A valve spring compressor will be required during this procedure. New valve stem oil seals should be used on reassembly.
1.8 litre (R2A type)
Dismantling
1 With the cylinder head removed, remove
the camshaft.
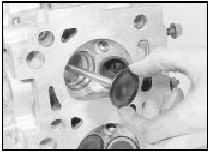
2 Using a valve spring compressor, compress one of the valve springs until the split collets can be removed from the grooves in the valve stem. Release the compressor and remove the cap and spring, identifying them for location. If the cap is difficult to release, do not continue to tighten the compressor, but gently tap the top of the tool with a hammer.
Always make sure that the compressor is firmly located on the valve head and the cap (see illustrations).
21.2a Compress the valve spring . . .
21.2b . . . to free the split collets . . .
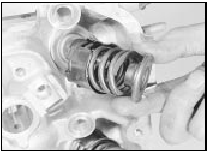
21.2c . . . then remove the cap and spring - 1.8 litre (R2A)
3 Prise the oil seal from the valve stem, and remove the spring seat, then withdraw the valve (see illustrations).
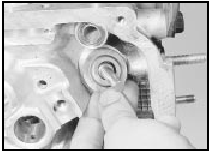
21.3a Remove the spring seat . . .
21.3b . . . and valve - 1.8 litre (R2A)
4 Repeat the procedure given in paragraphs 2 and 3 for the remaining valves, keeping all components identified for location so that they can be refitted in their original positions.
Note that the inlet valve springs are fitted with metal dampers. The damper is an integral part of the spring and cannot be removed (see illustration).
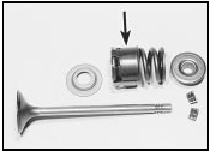
21.4 Inlet valve components. Spring damper arrowed - 1.8 litre (R2A)
Reassembly
5 Commence reassembly by lubricating the
valve stems and guides with SAE 80/90
hypoid oil, then insert the valves into their
original guides.
6 Refit the spring seats over the valve stems.
7 Wrap a thin layer of adhesive tape over the collet grooves of each valve, then smear the new oil seals with a little hypoid oil and slide them down the valve stems onto the spring seats. Use a suitable metal tube to seat the seals, then remove the adhesive tape from the valves (see illustration).
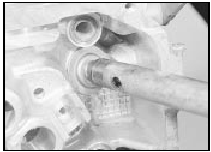
21.7 Seat each new valve seal using a metal tube - 1.8 litre (R2A)
8 Working on each valve in turn, fit the valve spring and cap, then compress the spring using the valve spring compressor and fit the split collets to the groove in the valve stem.
Release the compressor and tap the end of the valve stem with a soft-faced mallet to settle the components. If the original components are being refitted, ensure that they are refitted in their original locations.
9 Refit the camshaft.
1.6 and 1.8 litre (R6A type) 10 Proceed as described in paragraphs 1 to 9 inclusive, but note that no dampers are fitted to the inlet valve springs on the 1.6 litre engine.
Cylinder head - inspection and renovation
Refer to Section 23, Chapter 2, Part A but pay particular attention to the note at the beginning of the Section as all CVH engines are fitted with hardened valve seats.
See also:
Fuel injectors - removal and refitting
Note: Refer to the precautions at the end of
Section 1 before proceeding. New injector
seals will be required on refitting.
Removal
1 Disconnect the battery negative lead.
2 Depressurise the fuel ...
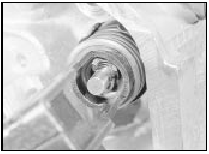
Charge air temperature sensor - removal and refitting
Removal
1 The charge air temperature sensor is only
used on KE-Jetronic systems and is located in
the air inlet duct (see illustration).
17.1 Charge air temperature sensor location (arrowed)
2 ...
Load apportioning valve P100 models) - removal and refitting
Caution: Refer to the
precautions in Section 1.
Removal
1 Chock the front wheels, jack up the rear of
the vehicle and support on axle stands (see
“Jacking and Vehicle Support”).
2 The load appor ...
