
Handbrake cable - adjustment
Note: Where fitted, the adjuster locking pin must be renewed on completion of adjustment.
Conventional braking system
(except P100 models)
1 The handbrake cable is normally
self-adjusting in use, however adjustment
may be required to compensate for cable
stretch over a long period, and is also
necessary after fitting a new cable.
2 Chock the front wheels, jack up the rear of the vehicle and support on axle stands (see “Jacking and Vehicle Support”). Release the handbrake.
3 Unscrew the locknut from the adjuster located on the left-hand underbody bracket (see illustration).
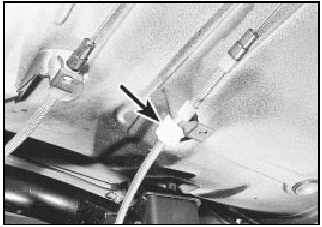
28.3 Handbrake cable adjuster on left-hand underbody bracket (arrowed)
On later models, a locking pin is fitted to the bracket to lock the adjuster nuts in position. Where applicable, remove the locking pin before unscrewing the locknut.
4 Apply the footbrake vigorously several times to set the self-adjuster mechanism.
5 Turn the adjuster until the plastic plungers located in the brake lockplates are free to turn, and the total movement of both plungers added together is between 0.5 and 1.0 mm (0.02 and 0.04 in) (see illustration).
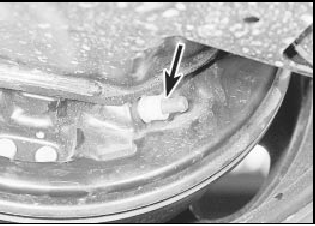
28.5 Plastic plunger (arrowed) in brake backplate
6 Tighten the adjuster locknut against the adjuster nut by hand (two clicks), then tighten further by a minimum of two and a maximum of four clicks, using a suitable spanner or pliers.
7 Where applicable, fit a new adjuster locking pin. The old pin should not be re-used.
8 Check that with the handbrake released, the rear wheels are free to rotate and no brake “bind” is evident. The handbrake lever travel should be between two and four clicks of the ratchet. If brake “bind” or excessive lever travel is evident, check the handbrake cable routing, and check the self-adjuster mechanism for wear or damage.
ABS
9 Proceed as described in paragraphs 1 to 3
inclusive.
10 Bend back the tangs and release the cables from the lower suspension arms.
11 Ensure that both handbrake operating levers are returned to their stops on the calipers, then make alignment marks between the levers and the caliper bodies (see illustration).
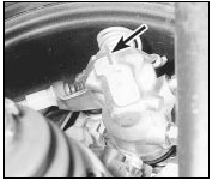
28.11 Make alignment marks between each handbrake operating lever and caliper
body (arrowed) - ABS
12 Turn the adjuster until either lever just starts to move, as indicated by the alignment marks.
13 Apply the handbrake and release it several times to equalise the cable runs.
14 With the handbrake released, proceed as described in paragraphs 6 and 7.
15 Refit the cables to the lower suspension arms, and secure by bending over the tangs.
16 Check that with the handbrake released, the rear wheels are free to rotate and no brake “bind” is evident. The handbrake lever travel should be between two and four clicks of the ratchet. If brake “bind” or excessive lever travel is evident, check the handbrake cable routing, and check the caliper mechanism for wear or damage.
P100 models
17 Proceed as described in paragraphs 1 to
4 inclusive, but note that the adjuster is
located on the right-hand side of the chassis
crossmember (see illustration).
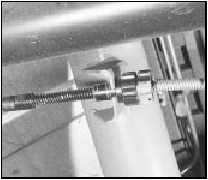
28.17 Handbrake cable adjuster on righthand side of chassis crossmember
18 Apply the handbrake, pulling the lever upwards three clicks.
19 Turn the adjuster until both rear wheels are locked and cannot be turned by hand.
20 Proceed as described in paragraphs 6 and 7.
21 Check that with the handbrake released, the rear wheels are free to rotate and no brake “bind” is evident. The handbrake lever travel should be between three and five clicks of the ratchet. If brake “bind” or excessive lever travel is evident, check the handbrake cable routing, and check the self-adjuster mechanism for wear or damage.
See also:
Modulator drivebelt (antilock braking system) - removal and
refitting
Note: Whenever an ABS modulator adjuster
bolt is slackened or removed, the bolt threads
should be lightly coated with grease to
prevent the possibility of bolt seizure. Take
care not to contaminat ...
Crankshaft front oil seal - renewal
Note: A suitable puller will be required to
remove the crankshaft pulley. A new
crankshaft pulley bolt, and a new lower timing
chain cover gasket, must be used on refitting.
1 The crankshaft front ...
Automatic transmission brake band adjustment (Every 24 000 miles (40 000 km)
or 2 years)
Note: A brake band torque wrench - Ford tool
No 17-005, or a conventional torque wrench
and a splined socket of suitable size to fit the
square section head of the adjuster screw(s)
will be requir ...
