
Intercooler - removal and refitting
1985 models
Removal
1 Disconnect the battery negative lead.
2 Remove the air cleaner as described in Section 2.
3 Remove the intercooler upper and lower air hoses (see illustration).
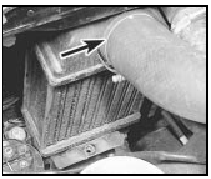
22.3 Intercooler upper air hose attachment (arrowed)
4 Undo the upper retaining bolt, tilt the intercooler towards the engine at the top and lift up to disengage the lower retaining pins.
Remove the unit from the engine compartment.
Refitting
5 Refitting is a reversal of removal.
1986 models onwards
Removal
6 Proceed as described in paragraphs 1 to 3.
7 Undo the two radiator and intercooler lower retaining bolts (see illustration).
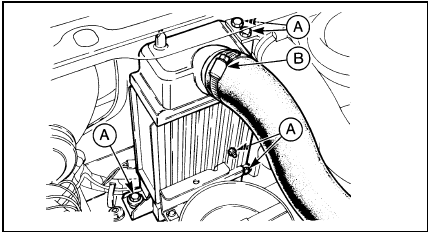
22.7 Intercooler mountings and attachments - 1986 models onwards
A Retaining bolts B Upper air hose
8 Move the radiator and intercooler assembly towards the engine and undo the four bolts securing the intercooler to the radiator.
9 Undo the retaining bolt and move the horn nearest to the intercooler to one side.
10 Withdraw the intercooler from the engine compartment.
Refitting
11 Refitting is a reversal of removal.
See also:
Oil pump - dismantling, inspection and reassembly
Note: A new pressure relief valve plug and
pick-up tube gasket will be required for
reassembly.
Dismantling
1 If oil pump wear is suspected, check the
cost and availability of new parts and the c ...
Engine - reassembly
Note: Ensure that all necessary new oil seals
and gaskets have been obtained before
starting the reassembly procedure.
OHV engines
1 With everything clean, commence
reassembly by oiling the bores ...
Pistons and connecting rods - examination and renovation
1 Examine the pistons for ovality, scoring,
and scratches. Check the connecting rods for
wear and damage. The connecting rods carry
a letter indicating their weight class; all the
rods fitted must ...
