Crankshaft front oil seal - renewal
Note: A new gasket will be required for refitting if the old seal housing is removed during this procedure.
1 Remove the timing belt and the crankshaft sprocket.
2 If an oil seal removal tool is available, the oil seal can be removed at this stage. It may also be possible to remove the oil seal by drilling the outer face and using self-tapping screws and a pair of grips.
3 If the oil seal cannot be removed as described in paragraph 2, remove the sump and the auxiliary shaft sprocket, then unbolt the oil seal housing and the auxiliary shaft front cover. Recover the gasket. The oil seal can then be driven out from the inside of the housing (see illustrations).
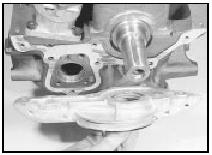
27.3a Removing the crankshaft front oil seal housing
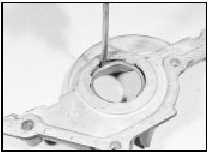
27.3b Driving the crankshaft front oil seal from the housing
4 Clean the oil seal housing, then drive in a new seal using a suitable metal tube or socket. Make sure that the seal lip faces into the engine and lightly smear the lip with clean engine oil (see illustration).
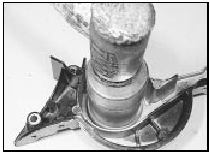
27.4 Using a socket to fit a new crankshaft front oil seal
5 Where applicable, refit the oil seal housing and the auxiliary shaft front cover, using a new gasket, and tighten the bolts. Using a straight edge, ensure that the bottom face of the oil seal housing is aligned with the bottom face of the cylinder block before finally tightening the bolts (see illustrations).
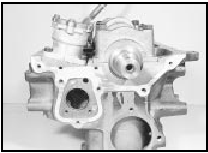
27.5a Crankshaft front oil seal housing/auxiliary shaft cover gasket located
on front of cylinder block
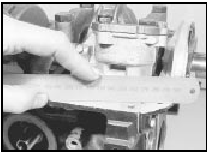
27.5b Checking the alignment of the crankshaft front oil seal housing
Refit
the auxiliary shaft sprocket and refit the sump.
6 Refit the crankshaft sprocket and timing belt.
Crankshaft rear oil seal - renewal
1 Remove the flywheel/driveplate and the engine adapter plate.
2 Extract the oil seal using an oil seal removal tool if available. It may also be possible to remove the oil seal by drilling the outer face and using self-tapping screws and a pair of grips (see illustration).
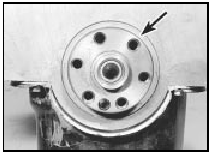
28.2 Crankshaft rear oil seal location (arrowed)
3 Clean the oil seal housing, then drive in a new seal using a suitable metal tube or socket. Make sure that the seal lip faces into the engine and lightly smear the lip with clean engine oil.
4 Refit the engine adapter plate and the flywheel/driveplate.
See also:
Throttle position sensor - removal and refitting
Note: During this procedure ensure that the
sensor wiper is not rotated beyond its normal
operating arc.
2.0 litre SOHC models
1 Disconnect the battery negative lead.
2 Free the throttle position ...
Throttle cable - adjustment, removal and refitting
Adjustment
The procedure is the same as described in
Part A of this Chapter for carburettor engines,
except that the cable adjuster is situated in a
bracket alongside the throttle housing.
Remova ...
Crankshaft rear oil seal - renewal
1 Remove the flywheel/driveplate.
2 Prise out the oil seal. If necessary, drill the
outer face of the oil seal and use self-tapping
screws and a pair of grips to withdraw the
seal (see illustratio ...
