Distributor cap and rotor arm (OHC models) - removal and refitting
SOHC models
1 Disconnect the battery negative lead.
2 Where applicable, unclip the screening can from the top of the distributor and disconnect the earth strap (see illustration).
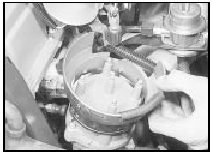
13.2 Unclipping the distributor screening can - Motorcraft distributor
3 If necessary, identify each HT lead for position, so that the leads can be refitted to their correct cylinders, then disconnect the leads from the spark plugs by pulling on the connectors, not the leads. Similarly, disconnect the HT lead from the coil. Where applicable, slide the HT lead holder from the clip on the camshaft cover (see illustration).
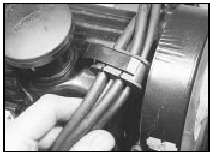
13.3 HT lead holder on camshaft cover
Lucas distributors
4 Remove the two securing screws and lift off
the distributor cap.
5 The rotor arm is a push-fit on the end of the distributor shaft.
6 Refitting is a reversal of removal, noting that the rotor arm can only be fitted in one position. Ensure that the HT leads are correctly connected.
Bosch distributors
7 Prise away the spring clips with a
screwdriver and lift off the distributor cap (see
illustration). On fuel injection models,
disconnect the crankcase ventilation hose
from the air inlet hose, then disconnect the air
inlet hose from the inlet manifold and the
airflow meter for improved access.
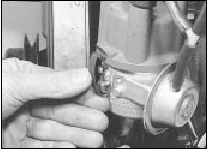
13.7 Securing distributor cap with spring clip - Bosch distributor
8 Refitting is a reversal of removal, noting that the rotor arm can only be fitted in one position.
Ensure that the HT leads are correctly connected, and on fuel injection models ensure that the air inlet hose clips are correctly aligned (refer to illustration, Section 15, Chapter 4, Part B).
Motorcraft distributors
9 For improved access, disconnect the
crankcase ventilation hose from the air inlet
hose, then disconnect the air inlet hose from
the inlet manifold and the airflow meter for
improved access.
10 Remove the two securing screws and lift off the distributor cap (see illustration).
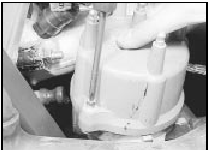
13.10 Removing a distributor cap securing screw - Motorcraft distributor
11 Remove the two securing screws and withdraw the rotor arm (disc) (see illustration).
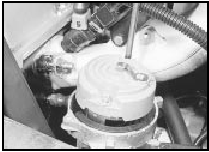
13.11 Removing a rotor arm (disc) securing screw - Motorcraft distributor
Note that on some vehicles, the rotor arm tip may be coated with silicone grease to assist radio interference suppression. Do not attempt to clean the grease off if it is present. If radio interference problems are experienced, consult a Ford dealer or an in-car entertainment specialist.
12 Proceed as described in paragraph 6, but additionally ensure that the air inlet hose clips are correctly aligned (refer to illustration, Section 15, Chapter 4, Part B).
DOHC models
13 Disconnect the battery negative lead.
14 Unclip the lower section of the distributor shield from the upper section, then unscrew the two securing nuts, and withdraw the upper section of the shield from the studs on the upper timing chain cover (see illustrations).
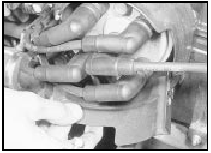
13.14a Unclipping the lower section . . .
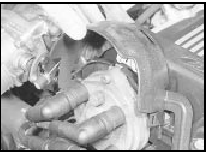
13.14b . . . and the upper section of the distributor shield
15 If necessary, identify each HT lead for position, so that the leads can be refitted to their correct cylinders, then disconnect the leads from the spark plugs by pulling on the connectors, not the leads. Similarly, disconnect the HT lead from the coil, and release it from the clip on the timing chain cover.
16 Using a suitable Torx key or socket, unscrew the two distributor cap securing screws, then lift off the cap.
17 The rotor arm is a push-fit on the end of the rotor shaft (see illustration).
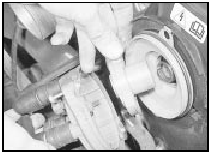
13.17 Removing the distributor cap and rotor arm
18 If desired, the rotor housing can be pulled from the timing chain cover.
19 Refitting is a reversal of removal, ensuring that the rotor arm is pushed fully home on the rotor shaft. Make sure that the HT leads are fitted to their correct cylinders. Note that the rotor arm will only fit in one position.
See also:
Brake hydraulic fluid renewal (Every 36 000 miles (60 000 km) or 3 years)
1 An assistant and bleeding equipment will
be needed. A considerable quantity of
hydraulic fluid will be required - probably
about 2 litres (nearly half a gallon).
2 Slacken the front wheel nuts. ...
Air cleaner - removal and refitting
The procedure is similar to that described in
Part A of this Chapter for carburettor engines. ...
Coolant renewal (Every 24 000 miles or 2 Years)
Cooling system draining
1 It is preferable to drain the system when the
coolant is cold. If it must be drained when hot,
release the pressure cap on the thermostat
housing (or expansion tank on la ...
