Engine mountings - renewal
1 The engine mountings incorporate hydraulic dampers and must be renewed if excessive engine movement is evident.
2 Working in the engine compartment, unscrew the central nuts securing the engine mounting brackets to the tops of the mountings. Recover the washers.
3 Apply the handbrake, jack up the front of the vehicle and support on axle stands (see “Jacking and Vehicle Support”).
4 Working underneath the vehicle, remove the central nuts securing the mountings to the crossmember. Recover the washers.
5 Raise the engine using a suitable hoist and lifting tackle attached to the engine lifting brackets on the cylinder head, or a jack and interposed block of wood under the sump, until the mountings can be withdrawn.
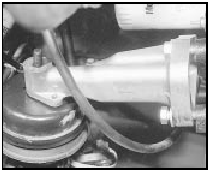
6 Fit the new mountings, then lower the engine onto them. Note that the locating pins on the mountings must engage with the corresponding holes in the engine mounting brackets (see illustration).

16.6 Locating pin on mounting must engage with hole (arrowed) in engine
mounting bracket
7 Fit the nuts and washers securing the mountings to the crossmember and tighten the nuts.
8 Lower the vehicle to the ground and fit the nuts and washers securing the engine mounting brackets to the mountings. Tighten the nuts.
See also:
Air cleaner air temperature control - description and testing
Thermostatically-controlled air
cleaner
1 On all pre-1986 models and certain models
from 1986 onwards, the air cleaner is
thermostatically-controlled by a vacuum
operated system to provide air at ...
Maintenance - bodywork and underframe
The general condition of a vehicle’s
bodywork is the one thing that significantly
affects its value. Maintenance is easy but
needs to be regular. Neglect, particularly after
minor damage, can lead ...
Engine oil and filter renewal (Every 6000 miles (10 000 km) or 6 months)
1 Frequent oil and filter changes are the most
important preventative maintenance
procedures which can be undertaken by the
DIY owner. As engine oil ages, it becomes
diluted and contaminated, whic ...
