Fuses and relays
Fuses
If electrical components in the
vehicle are not working, a fuse may
have blown. Blown fuses are
identified by a broken wire within
the fuse. Check the appropriate
fuses before replacing any electrical
components. 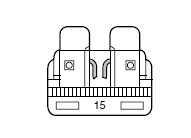
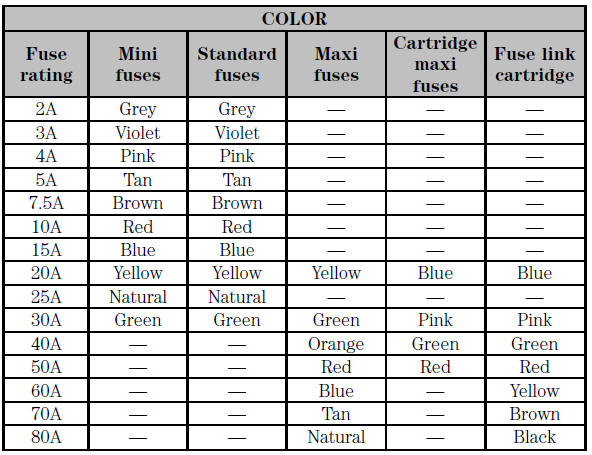
Note: Always replace a fuse with one that has the specified amperage rating. Using a fuse with a higher amperage rating can cause severe wire damage and could start a fire.
Standard fuse amperage rating and color
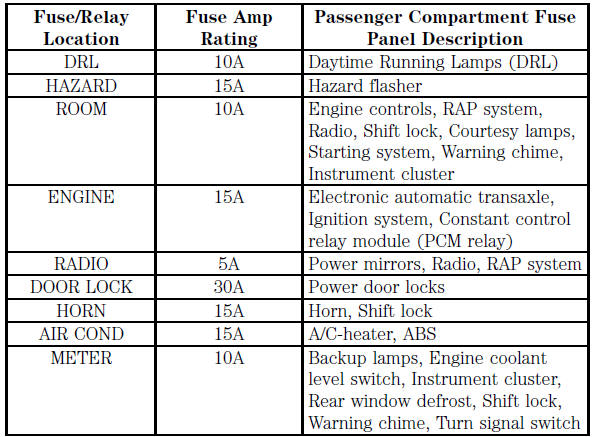
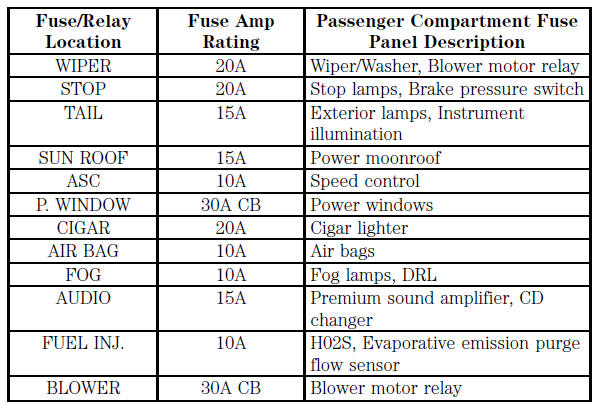
Passenger compartment fuse panel
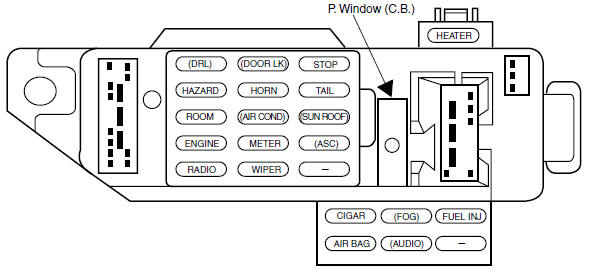
The fuses are coded as follows:
Power distribution box
The power distribution box is located in the engine compartment. The power distribution box contains high-current fuses that protect your vehicle's main electrical systems from overloads.
Always disconnect the battery before servicing high current fuses.
Always replace the cover to the power distribution box before reconnecting the battery or refilling fluid reservoirs
If the battery has been disconnected and reconnected, refer to the Battery section of the Maintenance and specifications chapter.
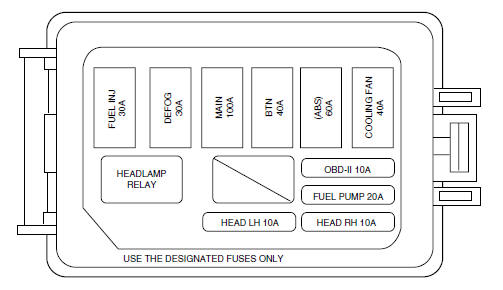
The high-current fuses are coded as follows.

Relays
Relays are located in the power distribution box and should be replaced by qualified technicians.
See also:
Suspension and steering
General information
The front suspension is of independent
MacPherson strut type incorporating coil
springs and integral telescopic shock
absorbers. The lower end of each strut is
attached to a h ...
Air cleaner - removal and refitting
2.0 litre SOHC models
1 Disconnect the battery negative lead.
2 Depress the locking clip on the airflow
meter wiring plug and disconnect the plug.
Pull on the plug, not the wiring.
3 Loosen the s ...
Fuel filter renewal (Every 24 000 miles (40 000 km) or 2 years)
Caution: Refer to the
precautions in Chapter 4, Part
B, Section 1 before proceeding.
2.0 litre SOHC fuel injection
models
1 The fuel filter is located on the left-hand
side of the engine compart ...
