Air cleaner element renewal (Every 24 000 miles or 2 Years)
Carburettor and Central Fuel
Injection (CFI) models
1 To remove the air cleaner lid undo and
remove the retaining screws or bolts on the
top face of the lid (see illustrations).
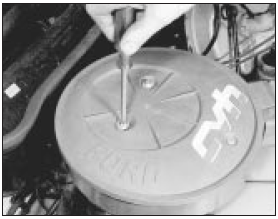
34.1a Removing the air cleaner retaining screws on a 1.3 litre CVH engine . .
.
34.1b . . . and air cleaner retaining screw locations on 1.4 litre CVH engine
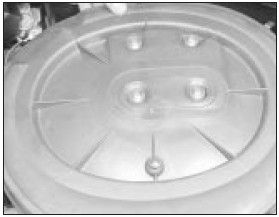
2 Where applicable release the lid retaining clips around the side of the air cleaner body (see illustration).
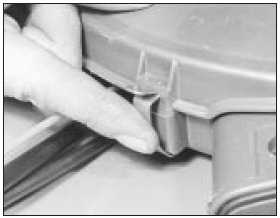
34.2 Release the air cleaner lid retaining clips, where fitted
3 Lift off the lid, remove and discard the paper element and wipe out the inside of the air cleaner body and lid (see illustration).
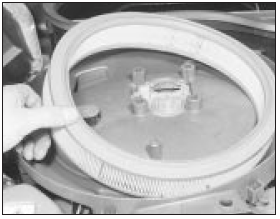
34. 3 Removing the air cleaner element
4 Place a new element in position and refit the lid.
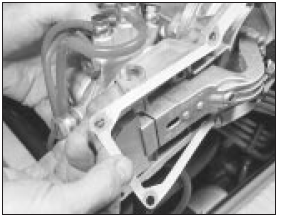
Bosch K-Jetronic fuel injection
models
5 Disconnect the battery earth lead.
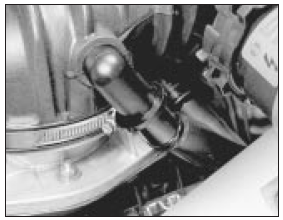
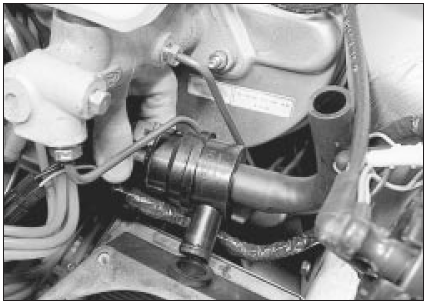
6 Unscrew and loosen off the air ducting-tosensor plate unit securing band, then separate the two (see illustrations).
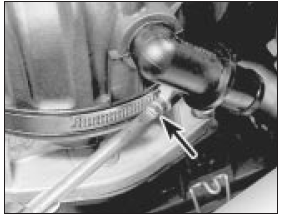
34.6a Slacken the securing band screw . . .
34.6b . . . and lift the air duct away from the sensor plate unit - K-Jetronic
system
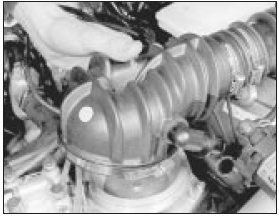
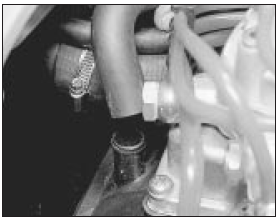
7 Carefully pull free the shut-off valve hose from the air ducting connector. The hose is a press fit (see illustration).
34.7 Detach the shut-off valve hose - K-Jetronic system
8 Unscrew and remove the six air sensor plate-to-cleaner top cover retaining screws, but leave the plate unit in position.
9 Prise free and release the air cleaner cover retaining clips and detach the hose from the cover at the front (see illustration).
34.9 Detach the hose from the front of the air cleaner cover - K-Jetronic
system
10 Carefully lift the sensor plate clear, together with its gasket, and pivot it back out of the way. Withdraw the shut-off valve from the rear end of the cleaner case cover, then lift out the cover and remove the element from the casing (see illustrations).
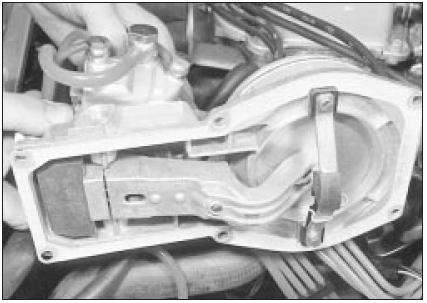
34.10a Lift the sensor plate clear . . .
34.10b . . . withdraw the shut-off valve . . .
34.10c . . . lift out the cover . . .
34.10d . . . and withdraw the element - K-Jetronic system
11 If the air cleaner casing is to be removed you will need to detach the fuel filter from the side of the cleaner casing (leave the fuel lines attached to the filter) and the air inlet hose from the front end of the case. Unscrew and remove the casing retaining nuts from the inner wing panel and lift out the casing.
12 Refitting is the reversal of the removal procedure. Wipe the casing clean before inserting the new element. When fitting the sensor plate unit into position on the top cover check that the gasket is in good condition and aligned correctly (see illustration).
34.12 Locating the sensor unit gasket
13 Check that all connections are secure on completion.
Bosch KE-Jetronic fuel injection
models
14 Undo the two bolts securing the air
cleaner assembly to the air sensor plate unit
and remove the air cleaner assembly (see
illustration).
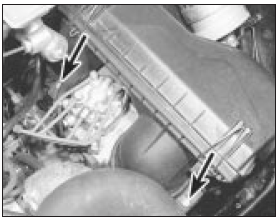
34.14 KE-Jetronic air cleaner retaining bolts (arrowed)
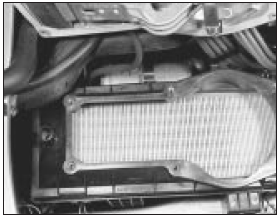
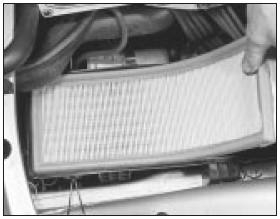
15 Unclip the retaining clips and lift off the air cleaner top cover. Remove the filter element (see illustration).
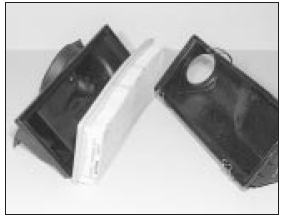
34.15 Lift off the air cleaner and remove the element - KE-Jetronic system
16 Clean the inside of the air cleaner body and fit a new filter element. Place the top cover in position and secure with the clips.
17 Refit the unit to the air sensor plate and secure with the two bolts.
Electronic Fuel Injection (EFI)
models
18 Proceed as described in paragraphs 15
and 16.
See also:
Alternator brushes and regulator - renewal
Bosch alternator
1 With the alternator removed from the
engine, clean the external surfaces free from
dirt.
2 Extract the brush box/regulator screws
from the rear cover and withdraw the brush
bo ...
Headlamp wiper motor - removal and refitting
Note: On vehicles fitted with foglamps, the
headlamp unit must be removed when the righthand
headlamp wiper motor is to be removed.
Removal
1 Disconnect the battery negative lead.
2 Disconnect th ...
Sump - removal and refitting
Note: New gaskets and sealing strips must be
used on refitting.
Removal
1 Disconnect the battery negative lead.
2 Drain the engine oil.
3 Remove the starter motor as described in
Chapter 5, Part ...
